Create an event and submit it for review
3 min read · updated 30 September 2026
Every event on chiro.events belongs to a profile, such as your association, your education provider, your company or your personal profile. You can create one if you are an admin there. Before it appears publicly, we take a look at it once.
1Create an event
- 1In the dashboard, open your profile and then Events.
- 2Click Create event. A small window asks for Title, Date and Type. You can still change all three later in the editor.
- 3With Create draft the event lands in your list as a draft. With Continue in the editor you go straight on in the editor.
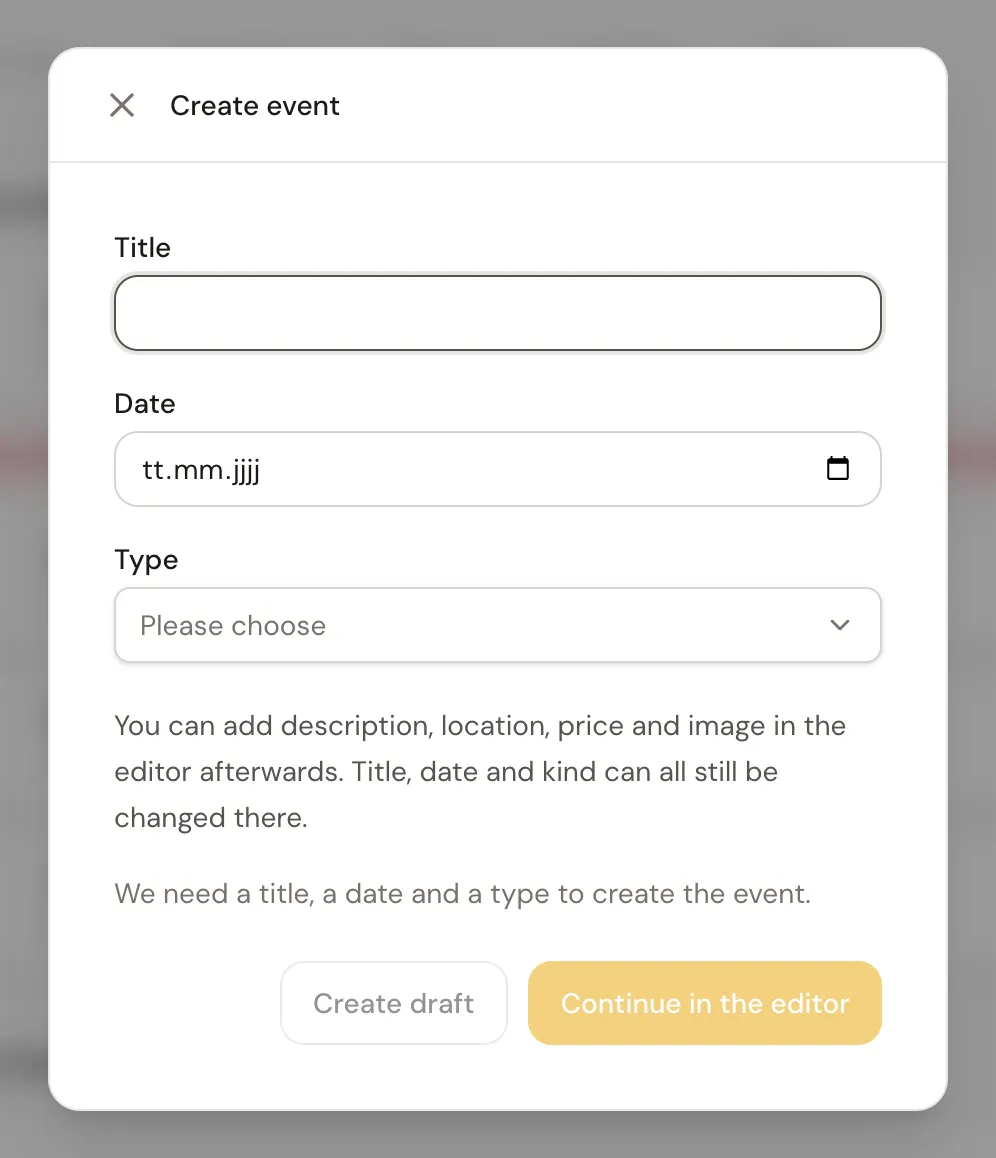
You create events on a computer. On a phone, the window shows a note instead. With Email me the link or Copy link you get the page to your computer and continue there.
2Fill it in in the editor
In the editor, you first fill in the Basic settings. After that, the Required fields open, for example start and end, address, price, registration link, categories and speakers. The Additional fields are optional and open once the required fields are filled in.
On the right you see a preview of your event page. Your entries save automatically, and at the top you can see when it was Last saved. With Back to overview you go back.
3Submit for review
In your list, click the event. The overview shows the Completeness and how many required details are already filled in. Once everything is there, click Submit for review. If something is still missing, the symbol on the button tells you what it is.
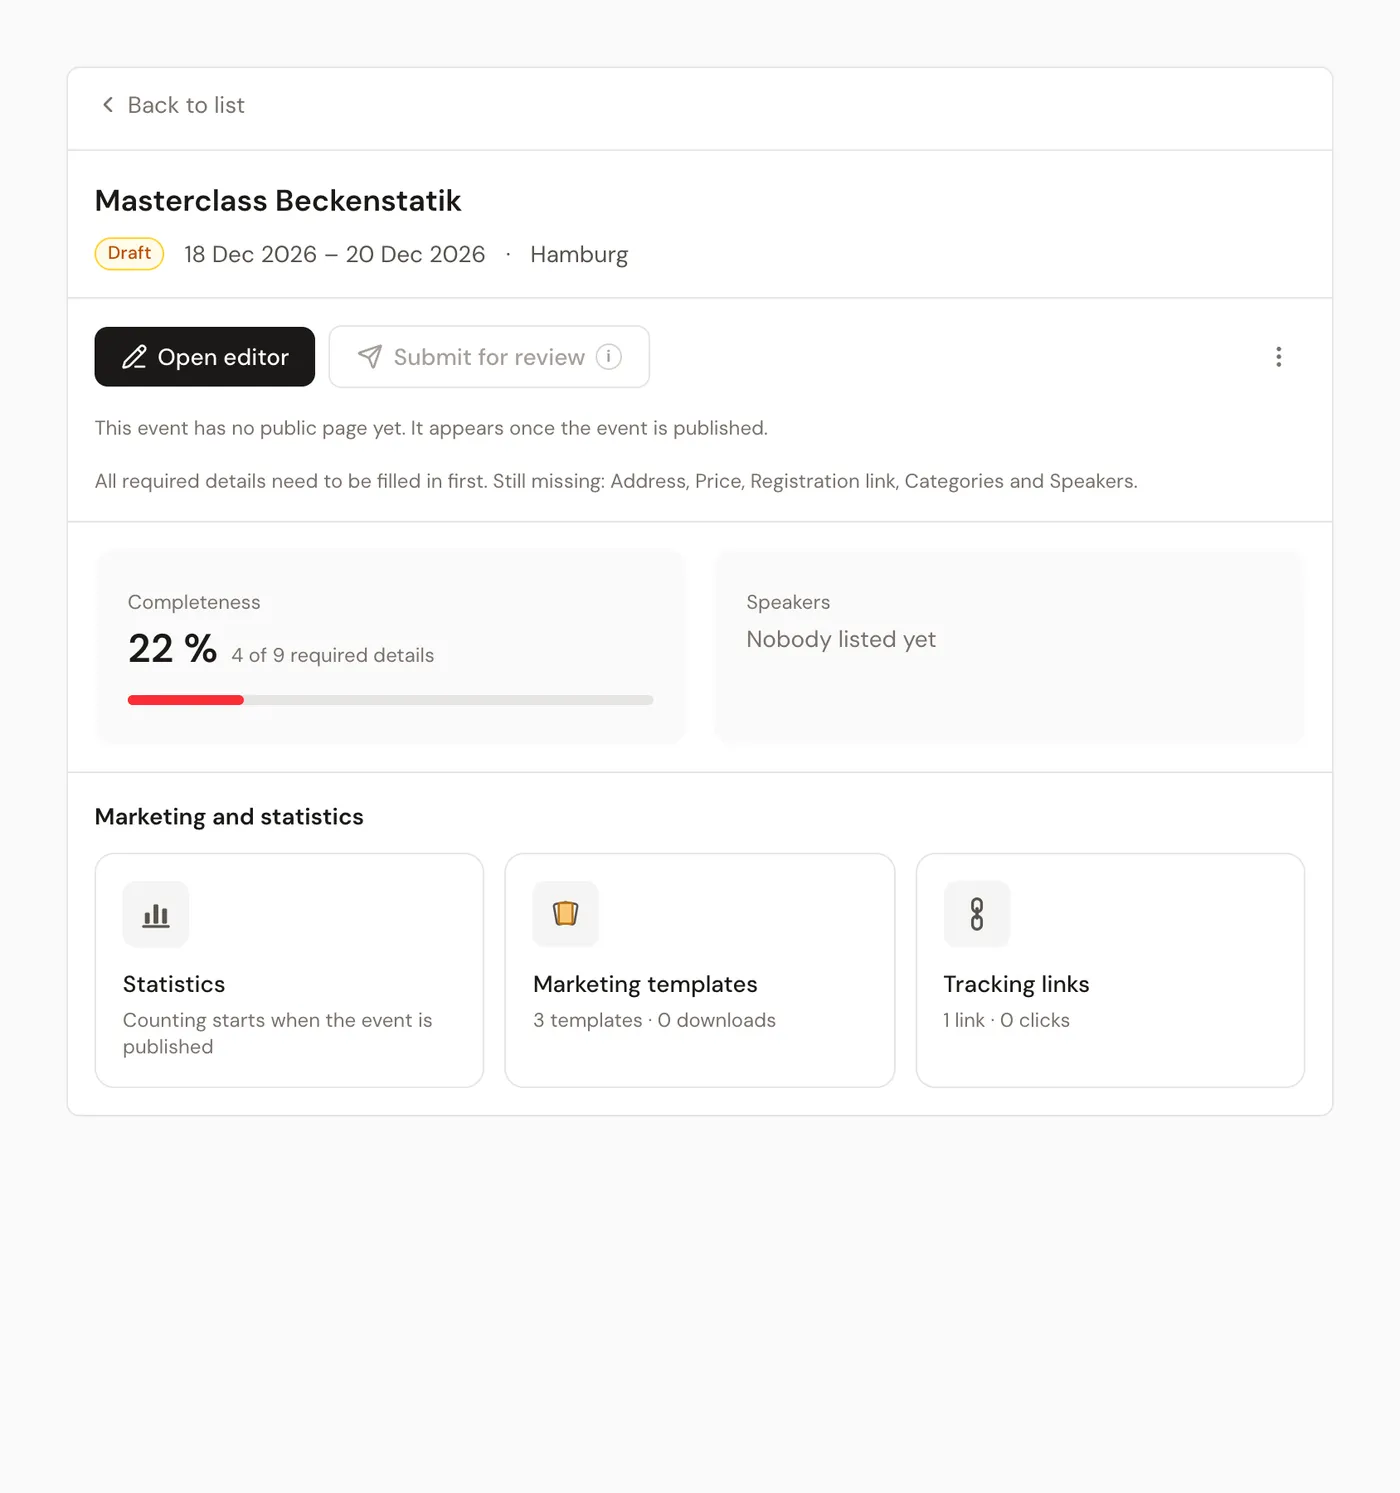
While we review it, the event is under Needs you with In review. You get an email about the result. Once it is approved, it appears with Live under Upcoming. If we do not approve it, the Reason is shown there, and with Revise you make the changes.
4Cancel and delete
If an event does not take place, choose Cancel event in the overview, in the menu with the three dots. The event page stays up and shows a cancellation notice, and everyone who saved it gets a message. With Undo cancellation you reverse this, as long as the date has not passed.
In the same menu, Delete removes the event from the platform. It then sits in the Trash at the bottom of your Events page. You cannot publish it again yourself, only we can do that. With Empty trash you permanently delete everything in it.